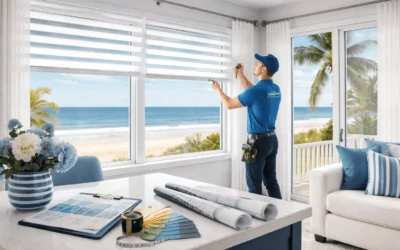
Many homeowners believe that measuring is simple, “just width and height, right?” Wrong. Even minor miscalculations can result in blinds that do not fit, hang crookedly, or leave gaps, making your investment annoying rather than functional. Unlike curtains, which may be hemmed or adjusted, custom window treatments are manufactured exactly to the numbers you provide. Once produced, they typically cannot be altered.
This guide helps beginners through each stage, providing examples, tips, and common mistakes to avoid. Even if this is your first time measuring windows, you’ll have the confidence to measure your windows like a pro.
Why Accurate Measurements Are Critical
Understanding the necessity of precision encourages you to take the process seriously. Here’s why this matters:
Custom fit: Even though they appear to be identical, each window has small variations. Coastal homes near Orange Beach, Gulf Shores, and Fairhope frequently have warped windows caused by humidity or sun exposure.
Functionality: Blinds that are too wide, narrow, or uneven may stick, slide unevenly, or fail to block light properly.
Appearance: Ill-fitting blinds or shades make even a beautifully designed room look sloppy.
Cost: Correct measurements save money. Most manufacturers won’t remake a product for free if it was measured incorrectly.
Accurate measurements ensure that your blinds fit perfectly, operate smoothly, and look polished.
Tools You’ll Need
Before measuring, gather the right tools:
- Steel tape measure – flexible fabric tapes can bend and give inaccurate results.
- Pencil and paper (or a notes app) – keep measurements organized.
- Step stool – for high or hard-to-reach windows.
- Level (optional) – useful if window frames are slightly uneven
Pro tip: Good lighting helps you clearly see the edges of the frame and avoid errors.
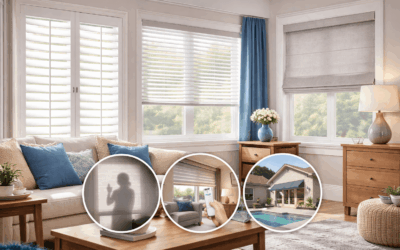
Step 1: Choose Your Mount Type – Inside vs Outside
Before you start measuring, you must decide how your blinds or shades will be mounted. The mount type affects all of your measurements, the final appearance, and how effectively the blinds work. Selecting the incorrect mount type is a typical mistake that can cost you money and time.
Why Mount Type Matters
Your mount choice determines:
- Aesthetics: Inside mounts give a clean, built-in look that showcases your window trim, while outside mounts can create a bold statement or make a window appear larger.
- Light Control: Inside mounts leave small gaps around the edges, which can let in light. Outside mounts provide more coverage.
- Privacy: Outside mounts can help block light and prying eyes, especially for street-facing windows.
- Ease of Installation: Some mounts are easier for beginners, while inside mounts require more precise measurements.
Example: If you are living in Orange Beach or Gulf Shores and your windows receive direct afternoon sunlight, an outside mount may help block light and keep your home cooler.
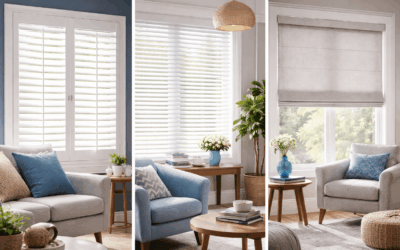
Inside Mount
Inside mounts are installed within the window frame, giving a clean and modern look.
Benefits of Inside Mounts:
- Streamlined, built-in appearance
- Highlights decorative trim
- Blinds sit flush with the wall
Requirements:
- Enough window depth to accommodate the blind hardware
- Relatively square window frame
How to Decide:
- Check your frame depth. For most roller shades, 2–3 inches is required.
- If your frame is shallow or uneven, an inside mount might cause the blinds to stick or hang crooked.
Example: A 4-inch deep frame is ideal for cellular shades. If your frame is only 2 inches deep, you may need to do an outside mount instead.
Pro Tips:
- Use inside mounts for a minimalistic or modern style.
- Double-check frame depth at top, middle, and bottom because coastal homes can have slight variations due to humidity.
Outside Mount
Outside mounts are installed on the wall or trim outside the window frame.
Benefits of Outside Mounts:
- Maximum light blocking
- Can make windows appear larger
- More forgiving for shallow or uneven frames
When to Use:
- Shallow window frames
- Windows that are not square
- If you want maximum coverage and privacy
Example: A 36″ wide window can be covered with a 40″ outside mount blind for improved light control and a more polished look.
Pro Tips:
- Add 2–4 inches to each side to block light and increase privacy.
- Great choice for large windows or sliding doors often found in vacation properties along the Gulf Coast.
Common Mistakes in Choosing Mount Type
- Assuming inside mount is always better
- Ignoring the depth requirement
- Forgetting that an outside mount can improve privacy and coverage
Beginner-Friendly Tips
- If you’re unsure, an outside mount is generally easier for first-timers.
- Always measure the depth of your window if considering an inside mount.
- Consider the purpose: light blocking, privacy, and appearance before deciding.
Step 2: Measuring Width Correctly – The Most Critical Part of the Entire Process
Width is not just “one of the measurements.”
It is the measurement that determines whether your blinds will:
- Fit smoothly
- Install easily
- Block light properly
- Look clean and intentional
If the width is wrong, nothing else matters.
Let’s break this down clearly and deeply.
Why Width Is So Important
When blinds or shades are manufactured, the width determines:
- The size of the headrail
- The alignment of slats or fabric
- How snugly it sits inside (or outside) the frame
- How much light leaks in from the sides
If the width even exceeds 1/8 inch for an inside mount, the blind will not fit into the frame. You can’t “push it in.” You cannot trim it.
If it is too narrow, you will have side gaps that allow light in while reducing privacy.
That is why this step requires patience.
First: Understand That Windows Are Rarely Perfect
Even in newly built homes, window frames are not perfectly square.
Humidity and temperature changes, particularly in coastal areas, can cause minor warping over time. The top of the window may be slightly larger than the bottom. Alternatively, the midsection could slightly bow inward.
That’s why you should never measure width just once.
You always measure in three locations.
Inside Mount Width – The Exact Method
Inside mount means the blind sits inside the frame opening.
That means the blind must fit within the tightest part of the window.
Here is the full method:
1️⃣ Measure the Top Width
Place the tape measure inside the frame at the very top.
Measure from:
Left inside edge → to → Right inside edge.
Make sure:
- The tape is straight.
- You are not measuring trim or outer molding.
- You are measuring the inner opening only.
Write down the number exactly as shown.
2️⃣ Measure the Middle Width
Now measure across the middle of the window.
Do not assume it’s the same as the top.
If the frame bows inward slightly, the middle may be narrower.
Write down the exact number.
3️⃣ Measure the Bottom Width
Measure across the bottom inside edge.
Sometimes, older homes taper slightly, and the bottom may be the narrowest point.
Write the number exactly.
4️⃣ Use the Smallest Measurement
This is the most important rule:
👉 For inside mount, always use the smallest width measurement.
Why?
Because that is the tightest point in the frame.
The blind must fit that point, or it won’t fit at all.
Real Example
– Top: 48 1/4”
– Middle: 48”
– Bottom: 47 7/8”
You order: 47 7/8”
Even though 48 1/4” is larger, using it would cause installation failure.
Common Beginner Mistakes (Inside Mount)
Let’s eliminate problems before they happen.
❌ Measuring from outside trim instead of inside opening
❌ Measuring only once
❌ Using the largest measurement
❌ Rounding numbers
❌ Forgetting to measure to the nearest 1/8 inch
Never round 47 7/8” to 48”. That tiny difference matters.
Special Tip for Coastal or Humid Environments
In areas with humidity:
- Measure once.
- Wait a few minutes.
- Measure again.
Wood frames can slightly expand or contract. If you see variation, trust the smallest width.
Outside Mount Width – Completely Different Approach
Outside mount works differently.
Here, you are not fitting inside the frame.
You are deciding how much of the wall or trim you want covered.
This gives you more flexibility.
Why Width Still Matters for Outside Mount
Outside mount width determines:
- How much light gets blocked
- Whether there are visible side gaps
- How dramatic or balanced the window looks
If you only measure the glass width and order that exact size, you will have side light gaps.
That’s not a mistake in installation, that’s a mistake in measurement planning.
How to Measure Outside Mount Width Properly
Step 1: Measure the Window Opening
Measure the full width of the window frame or trim.
Example: 36”
Step 2: Add Extra Width
For proper coverage, add:
- 2–3 inches on each side minimum
- 4 inches per side for bedrooms or strong light control
So:
36” window
- 2” left
- 2” right
= 40” blind
Now you have proper overlap.
Why Extra Width Is Important
Without added width:
- Light will leak through the sides
- Privacy is reduced
- The window looks undersized
Adding width makes the window feel larger and more balanced.
Real-Life Scenario
Let’s say you’re measuring a street-facing living room window.
Glass width: 35”
Frame width: 36”
If you order 36” exactly, light will leak from both sides.
If you order 42”:
- Light control improves
- Privacy improves
- The window visually appears larger
This is intentional design, not over-measuring.
Common Outside Mount Mistakes
❌ Forgetting to add side overlap
❌ Measuring only the glass
❌ Ignoring wall space limitations
❌ Not checking for obstacles like light switches or adjacent walls
Always check:
Is there enough wall space to extend 2–4 inches on each side?
Advanced Tip: Visual Balance Matters
If you have multiple windows in one room:
Even if one window is slightly smaller, sometimes you intentionally match the outside mount width so all blinds look symmetrical.
That’s a design decision, but you must measure each window first.
How Manufacturers Handle Width (Important Insight)
For inside mounts:
Manufacturers usually subtract a small deduction (often around 1/4”) so the blind fits smoothly inside the frame.
You do NOT subtract anything yourself.
You provide the exact smallest measurement.
They adjust.
If you subtract yourself, your blind spot will be too narrow.
Before moving to height, confirm:
✔ Measured top, middle, bottom
✔ Used the smallest measurement (inside mount)
✔ Added overlap (outside mount)
✔ Measured to the nearest 1/8 inch
✔ Labeled the window clearly
✔ Double-checked once more
If the width is correct, 50% of your job is already done properly.
Take a breath.
That’s width done correctly.
Step 3: Measuring Height Correctly – Where Most People Make Quite Mistakes
Height sounds simple. Top to bottom. But this is where people accidentally create:
- Gaps at the sill
- Crooked-looking blinds
- Shades that don’t fully cover
- Treatments that stack awkwardly
Width determines if it fits.
Height determines if it looks right and functions properly.
Let’s break it down fully.
Why Height Matters More Than You Think
Height affects:
- Light blocking
- Privacy
- Visual balance
- How many fabric stacks are there when open
- Whether the bottom rail sits evenly
If the height is too short:
- You get a visible gap at the bottom.
- It looks unfinished.
If height is too long (inside mount):
- It may bunch slightly.
- It may rub the sill.
- It may not sit evenly if the sill isn’t level.
And here’s something beginners don’t realize:
Window sills are often not perfectly level. That’s why we measure multiple times.
Inside Mount Height – The Correct Way
Inside mount means the blind sits inside the frame opening.
That means the height must match the deepest point of the window.
Step 1: Measure the Left Side
- Place your tape measure inside the frame at the very top.
- Measure straight down to the sill (or bottom inside edge).
- Do not measure diagonally.
- Do not measure the outer trim.
- Measure from inside edge → straight down.
- Write the number exactly.
Step 2: Measure the Center
Now measure from the top inside edge → straight down to the center of the window.
Frames can bow slightly.
Write that number.
Step 3: Measure the Right Side
Repeat the process on the right side.
Write it down.
Now you have three height measurements.
Which Height Do You Use?
👉 For inside mount, always use the longest measurement.
This ensures the blind reaches the deepest point of the window opening.
Why Use the Longest?
Let’s say:
Left: 60”
Center: 60 1/4”
Right: 60”
If you order 60”, the center will show a 1/4” gap. If you order 60 1/4”, the blind fully covers the deepest section. That’s the correct choice.
What If the Sill Is Uneven?
This is common. If one side is slightly higher than the other, the blind will follow gravity, not the sill.
That means:
- The bottom rail may look slightly above the sill on one side.
- That’s normal.
The blind is straight. The sill is not. Do not try to “correct” this with a shorter height.
Common Inside Mount Height Mistakes
❌ Using the shortest measurement
❌ Measuring from outside trim
❌ Forgetting to measure three times
❌ Not measuring straight down
❌ Rounding numbers
Always measure to the nearest 1/8 inch.
Outside Mount Height – Different Rules
Outside mount gives you creative control.
Here, you decide how dramatic or functional the coverage should be.
Why Height Matters More for Outside Mount
Outside mount height affects:
- Visual ceiling height
- Light blocking effectiveness
- Room proportions
- How large does the window appear?
This is not just a measurement. This is design.
Step 1: Decide Where the Top Will Be Mounted
Most homeowners mount:
- 2–4 inches above the window frame minimum
- 4–8 inches above for dramatic effect
Mounting higher creates the illusion of taller ceilings.
Example
Window opening height: 60”
You mount 4” above the trim
Your measurement becomes:
60” + 4” = 64”
Now your blind looks taller and more elegant.
Step 2: Decide Where the Bottom Should Stop
You have options:
- Stop exactly at the sill
- Extend 2–3 inches below the sill
- Go floor-length
Each creates a different look.
For Bedrooms (Light Control): Extend slightly below the sill. This reduces light gaps at the bottom.
For Large Living Room Windows: Extending lower can make the window feel grander.
Real-Life Example
Let’s say:
Window height = 58”
You mount 3” above
You extend 2” below the sill
Final blind height = 63”
This gives better coverage and better proportions.
Common Outside Mount Height Mistakes
❌ Mounting directly on the trim without checking clearance
❌ Forgetting to account for furniture below the window
❌ Not measuring wall space above
❌ Ignoring stack height (especially for large shades)
Always check:
Is there enough flat wall space above the window?
Important: Consider Stack Height
This is something beginners rarely think about.
When blinds or shades are open:
– They don’t disappear.
– They stack at the top.
Larger blinds = larger stack.
If your window is short and you mount too low, the stack may block part of the glass even when open.
Manufacturers provide stack height charts; check them if the window size is small.
Coastal Home Consideration for Height
Humidity and expansion affect width more than height, but:
– Wooden sills in coastal homes may not be level.
– That’s why measuring three vertical points is important.
– Never assume left and right are equal.
Height Measurement Final Checklist
Before moving on, confirm:
✔ Measured left, center, right
✔ Used longest measurement (inside mount)
✔ Decided mounting height intentionally (outside mount)
✔ Considered extending above trim
✔ Considered extending below the sill
✔ Checked wall clearance
✔ Measured to the nearest 1/8 inch
Width determines fit. Height determines elegance and coverage.
Now your blinds will not just fit, they will look intentional.
Step 4: Measuring Window Depth – The Step Most Homeowners Skip (and Regret Later)
Depth is the quiet measurement.
People focus on width and height and completely ignore depth.
Then installation day comes… and the headrail sticks out awkwardly, or worse, the blinds won’t fit inside the frame at all.
Depth determines one critical thing:
👉 Can you actually do an inside mount?
Let’s go properly.
Why Depth Matters More Than You Think
Depth determines:
- Whether the headrail fits inside the frame
- Whether the blinds sit flush or stick out
- Whether handles or cranks will interfere
- How clean the final look appears
Every blind or shade has a minimum depth requirement.
If your frame is too shallow:
- The blind may not fit
- It may partially protrude
- It may block window handles
- It may look bulky instead of sleek
This is where inside-mount decisions are confirmed or rejected.
First: Understand What “Minimum Depth” Means
Manufacturers specify two numbers:
- Minimum Depth – the smallest depth required for installation
- Flush Mount Depth – the depth required for the blind to sit fully recessed and flush
These are different.
Example:
A roller shade might require:
- 2” minimum
- 3” for flush mount
If your frame is 2”, it will install but not sit flush.
If it’s 3”, it sits perfectly recessed.
How to Measure Depth Correctly (Inside Mount Only)
Depth is only relevant for an inside mount.
Outside mount does not require frame depth.
Here’s how to measure it properly.
Step 1: Measure From the Inside Front Edge
Place your tape measure at:
👉 The very front inside edge of the window frame.
Not the outer trim.
Not the wall.
Not the casing.
The inside opening edge.
Step 2: Measure Straight Back to the Glass
Measure straight back to:
- The glass
- Or the nearest obstruction
Do not angle the tape. Keep it straight.
Write the number exactly.
Step 3: Measure at Multiple Points
Just like width and height:
Measure depth at:
- Top
- Middle
- Bottom
Why?
Because frames can taper inward slightly. Use the smallest depth measurement.
Real Example
Top depth: 3”
Middle depth: 2 7/8”
Bottom depth: 3”
Use: 2 7/8”
That is your true usable depth.
Now Compare With Product Requirements
Let’s say:
Your usable depth = 2 7/8”
The blind require:
- 2 1/2” minimum
- 3” flush
Result: It will install. But it will not sit perfectly flush. Now you can make an informed decision.
What If There Are Obstructions?
This is where beginners make mistakes.
Check for:
- Window cranks
- Locks
- Tilt latches
- Security sensors
- Grilles
If a crank protrudes 1/2” into the frame:
Subtract that from usable depth. If the depth becomes too shallow, the inside mount may not work.
Coastal Home Considerations for Depth
In humid environments:
- Wooden frames can slightly swell
- Painted trim can add subtle thickness
- Old homes may have uneven drywall returns
Measure carefully and don’t assume uniform depth. Older coastal properties, especially, may surprise you.
Common Depth Mistakes
❌ Measuring outer trim instead of inner frame
❌ Measuring only once
❌ Ignoring window cranks
❌ Forgetting flush vs minimum depth difference
❌ Assuming all blinds need the same depth
Different products require different depths:
- Faux wood blinds usually require more depth
- Roller shades require less
- Plantation shutters require the most
Always check product specs.
What If Depth Is Not Enough?
Now we think logically. If depth is insufficient:
Option 1: Switch to outside mount.
Option 2: Accept partial protrusion.
Option 3: Choose a lower-profile product.
This is why depth is measured before ordering, not during installation.
Visual Impact of Shallow Depth
If depth is shallow and you install an inside mount anyway:
- The headrail may stick out
- The look may feel bulky
- The blind may interfere with the window function
That defeats the purpose of a clean inside mount aesthetic.
Depth Measurement Final Checklist
Before moving on:
✔ Measured inside front edge to glass
✔ Measured top, middle, bottom
✔ Used the smallest depth
✔ Checked for obstructions
✔ Compared against the manufacturer’s minimum
✔ Understood flush vs minimum requirement
If depth checks out, inside mount is viable. If not, outside mount is the smarter choice.
Step 5: Measuring Multiple Windows – Where Small Assumptions Create Big Problems
This is the step most people underestimate. They measure one window carefully… Then assume the rest of the windows in the room are the same.
That assumption causes more ordering mistakes than bad measuring techniques. Even windows installed side-by-side during the same construction project can vary by:
- 1/8 inch in width
- 1/4 inch in height
- Slight depth differences
And that tiny difference is enough to cause fit issues. Let’s break this down properly.
Why Measuring Each Window Individually Matters
Even if windows look identical:
- Framing can shift slightly during installation
- Drywall thickness may vary
- Wood trim can expand unevenly
- Older homes may have settling differences
In coastal or humid environments, especially, subtle expansion over time can create tiny variations between windows that were originally identical.
Those differences are invisible to the eye. But they are very visible during installation.
The Rule: Never Assume – Always Measure
Even if:
- Two-bedroom windows look identical
- Two living room windows sit side-by-side
- Sliding door panels appear symmetrical
Measure each one separately. Always.
How to Properly Measure Multiple Windows Without Confusion
Now this is important. The measuring itself is not the hardest part. The organization is.
Ordering mistakes often happen because:
- Measurements get mixed up
- Width and height are swapped
- Windows aren’t labeled clearly
So let’s fix that.
Step 1: Label Every Window Before Measuring
Before you touch the tape measure, assign each window a clear name.
For example:
- Living Room – Left Window
- Living Room – Right Window
- Bedroom 1 – Street Facing
- Kitchen – Over Sink
- Office – Rear Wall
Write the label first. Then measure. Never measure first and label later.
Step 2: Write Measurements in a Consistent Format
Always write:
Width × Height × Depth
Example:
Living Room – Left Window
47 7/8” W × 60 1/4” H × 2 7/8” D
Consistency prevents mental confusion later.
Step 3: Double-Check the Label After Measuring
After measuring one window:
Pause.
Re-read the label.
Confirm you’re writing numbers under the correct window name.
This sounds simple, but this is where people mess up.
Especially when measuring 8–10 windows in one session.
Real-World Example of a Costly Assumption
Imagine this scenario:
Two living room windows appear identical.
You measure one: 48” width
You assume the other is also 48”.
But in reality:
Window A: 48”
Window B: 47 7/8”
If you order both at 48” inside mount:
One fits. One doesn’t.
That 1/8” difference stops installation. This is not rare. It happens constantly.
When Windows Are Closed but Not Identical
Now here’s a more advanced design decision.
Let’s say:
Window A: 47 7/8”
Window B: 48”
You have two options.
Option 1: Order Each Custom Fit
Best for inside mount.
Each blind fits perfectly.
No risk.
Option 2: Make Them Visually Symmetrical (Outside Mount Only)
If doing outside mount:
You can intentionally order both at 48”.
Since the outside mount does not require a tight frame fit, symmetry can be preserved.
But only do this intentionally, never by assumption.
Special Case: Multiple Windows in a Single Frame Wall
Some homes have:
- Triple window groupings
- Double windows separated by narrow trim
- Large picture windows with flanking side windows
Measure each section individually.
Never measure the full span unless ordering a single large blind.
Even small center trim differences affect inside mount sizing.
Sliding Glass Doors & Large Panels
Large openings are even more critical.
Measure:
- Width at top
- Width at the middle
- Width at the bottom
Large frames are more prone to slight bowing.
Use the smallest width for inside mount.
For outside mount, add sufficient overlap.
And always consider stack space.
Large blinds stack more fabric at the top.
Common Multi-Window Mistakes
❌ Measuring one window and duplicating numbers
❌ Forgetting to label clearly
❌ Swapping width and height
❌ Mixing up inside and outside mount decisions
❌ Not double-checking before ordering
The more windows involved, the more organizational matters.
Final Verification Before Ordering
Before placing an order:
Go through each window and confirm:
✔ Label is correct
✔ Width measured 3 times
✔ Height measured 3 times
✔ Depth confirmed (if inside mount)
✔ Mount type clearly written
✔ Measurements written to the nearest 1/8 inch
Then pause.
Walk away for 10 minutes.
Come back.
Re-check one more time.
This final review prevents expensive mistakes.
The Golden Rule of Measuring
- Measure carefully.
- Label clearly.
- Assume nothing.
- Double-check everything.
If you follow that system:
- Your blinds will fit.
- Your installation will go smoothly.
- Your finished result will look intentional, not accidental.
Common Measuring Mistakes Homeowners Make
Measuring windows seems simple, which is exactly why so many mistakes happen. The majority of errors come from overconfidence rather than carelessness. A homeowner measures once, writes a figure quickly, and expects everything to be fine. However, window coverings are not forgiving products. They are produced to the exact dimensions you provide, and even a minor oversight can result in a painful installation issue.
Let’s go over the most common mistakes in detail so they don’t happen to you.
Measuring Only Once
This mistake is frequently caused by impatience rather than ignorance. A window looks square; measuring in multiple locations seems unnecessary. However, the human eye is not sensitive enough to detect minor irregularities in framing.
Window frames usually taper slightly from top to bottom. The center of the frame may bow inward by a fraction of an inch. In older homes, settling can cause minor irregularities that are difficult to notice but very real when installing a rigid product like blinds.
If you only measure the top width and record 48 inches, you may miss the fact that the bottom is 47 7/8 inches. That slight 1/8-inch difference is enough to keep an inside-mounted blind from fitting.
Measuring three times, top, middle, and bottom for width, and left, center, and right for height, is not excessive. It provides protection. It eliminates guessing and risk. It turns a hopeful measurement into a reliable one.
Rounding Numbers Incorrectly
Rounding feels harmless. It feels cleaner. Writing “48 inches” looks simpler than writing “47 7/8 inches.” However, window treatments are not approximate products. They are precision-built.
When you round up, even slightly, you’re adding material that might not fit inside your frame. When you round down, you may create light gaps, compromising privacy and aesthetics.
If your tape measure reads 35 3/4 inches, that is the number you use. Not 36 inches. Not 35.5 inches. Exactly what you see. Manufacturers typically make minor internal adjustments for inside mounting, so removing or rounding on your own can actually cause the very issue you were trying to avoid.
Forgetting Obstructions Like Handles or Cranks
This is among the most common installation-day surprises. The measurements are correct, the blinds arrive, and everything appears to be in order – until the window crank blocks the headrail from properly fitting into the frame.
Hardware that protrudes into the window aperture can reduce depth. A crank handle may extend half an inch. A lock mechanism could stick out slightly. Even a simple security sensor might cause issues with flush mounting.
It is not enough to measure only the bare frame. You must consider everything that occupies that space. After accounting for obstructions, the usable depth may become too shallow, making an inside mount no longer practical.
This mistake doesn’t show up on paper. It becomes visible during the installation process. That is why checking the entire frame before placing an order is just as important as writing numbers down.
Mixing Up Width and Height
This error is due to disorder rather than misunderstanding.
After measuring numerous windows in a single session, it’s simple to mistakenly reverse numbers. Using 60 by 48 instead of 48 by 60 is more frequent than most homeowners realize.
When windows are comparable in size, or numerous rooms are measured on a single day, the risk increases. Measurements can blur together without clear labeling.
Consistency is the safest method. Always write width first, followed by height. Before recording numbers, make sure to carefully label each window. After each window, pause briefly to ensure the entry is correct. It may appear simple, but this small discipline helps to avoid expensive ordering errors.
Special Situations You Should Know About
Not every window is equal. Some need extra attention, planning, or even professional assistance. Recognizing these situations ahead of time will help you prevent frustration later.
Measuring for Plantation Shutters
Plantation shutters are rigidly framed structures. Unlike blinds and fabric shades, they do not flex or adapt after installation. They must sit squarely within the window opening and perfectly align with the frame.
If a window is somewhat out of square, even barely, that imperfection becomes obvious once a shutter frame is installed. Gaps can appear uneven. Panels may not close smoothly. Alignment may feel slightly off.
Because shutters have their own frame, the depth requirements are generally higher than standard blinds. The mounting frame and louvers must both fit into the available interior space. If the window openings are not uniform, adjustments may need to be made during installation.
This is why shutters demand more careful measuring and why many homeowners prefer professional measurement for this product.
Measuring for Motorized Shades
Motorized shades include extra components that manual shades do not have. A motor housing sits within the headrail. Battery tubes or charging ports may require additional clearance. Hardwired systems may require access to an outlet.
The depth requirement may increase slightly, making stack height more important. If mounted too low, the shade’s rolled-up fabric may block a part of the window.
Planning for motorization requires thinking beyond width and height. It requires thinking about power access, mounting placement, and physical space for hardware. The dimensions are comparable, but the consequences of ignoring space requirements are far greater.
Arched or Specialty Windows
Arched, circular, angled, or custom-shaped windows fall into an entirely different category. These require radius measurements, exact templates, or manufacturer-specific measuring guidelines.
Unlike rectangular windows, customized forms do not have the same margin for mistakes. Even a small inaccuracy can alter the final fit.
In many cases, tracing templates or specialized measuring tools are needed. For homeowners without prior experience, this is often where professional measurement becomes the wiser choice.
When It’s Better to Schedule a Professional Measurement
DIY measurement is effective for regular rectangular windows in good condition. However, there are times when hiring a professional is a wise decision rather than a luxury.
Signs You Shouldn’t DIY
When your window frames are visibly uneven, broken, or notably out of square, perfection becomes more difficult to attain. If you are ordering high-end plantation shutters or complex motorized systems, the cost of error increases significantly.
If you measure repeatedly and still feel uncertain, your hesitation is meaningful. Doubt often signals that something is not fully understood or confirmed.
If your home has unusual forms or enormous bespoke openings, professional help may be able to save you money on remakes.
Benefits of Professional Measuring
Professionals bring experience and the ability to recognize patterns. They are capable of identifying frame irregularities, depth issues, and even hardware problems. They understand how things are made and how slight differences can effect final installation.
Perhaps most importantly, when a professional measures, the responsibility for fit often shifts to them. That accountability brings peace of mind.
Professional measuring is not about capability, but about risk management.
Final Thoughts: Measure Twice, Order Once
Measuring windows is not complicated, but it is deliberate. It requires patience, practice, and careful observation. The difference between a perfect installation and a frustrating one is frequently due to little details that were either confirmed or overlooked.
Taking the effort to measure accurately protects your investment. It guarantees that your blinds or shades fit properly, run smoothly, and appear intentional rather than improvised.
Slow measuring results in confident ordering.
Confident ordering leads to a seamless installation.
And smooth installation is what transforms window treatments from a purchase to an upgrade.
Common Window Treatment Mistakes Homeowners Regret Later: Addresses potential pitfalls when considering motorized options.